Are you constantly looking for ways to streamline your email management? Wondering if you can schedule emails in Outlook to send at a later time? The answer is yes, and we are here to guide you through the process step by step. Scheduling emails in Outlook can be a game-changer, allowing you to compose emails when it’s convenient for you and have them delivered at the most effective time for the recipient. In this blog, we will walk you through the simple yet powerful feature of scheduling emails in Outlook, helping you boost your productivity and maintain better communication efficiency. Let’s dive in and explore how you can make the most out of this handy functionality!
Setting up Outlook for Email Scheduling
If you are wondering, “can you schedule emails in Outlook?” The answer is yes, you can! Setting up Outlook for email scheduling is a convenient way to send emails at a later time without manually doing it. Follow these simple steps to schedule emails in Outlook efficiently.
Step 1: Open Outlook and Compose a New Email
Start by launching your Outlook application and creating a new email message. Address the email, write the subject line, and compose the message you wish to schedule.
Step 2: Click on the Options Tab
Once you have composed your email, navigate to the Options tab at the top of the email window. This tab contains various features, including the option to delay delivery.
Step 3: Delay Email Delivery
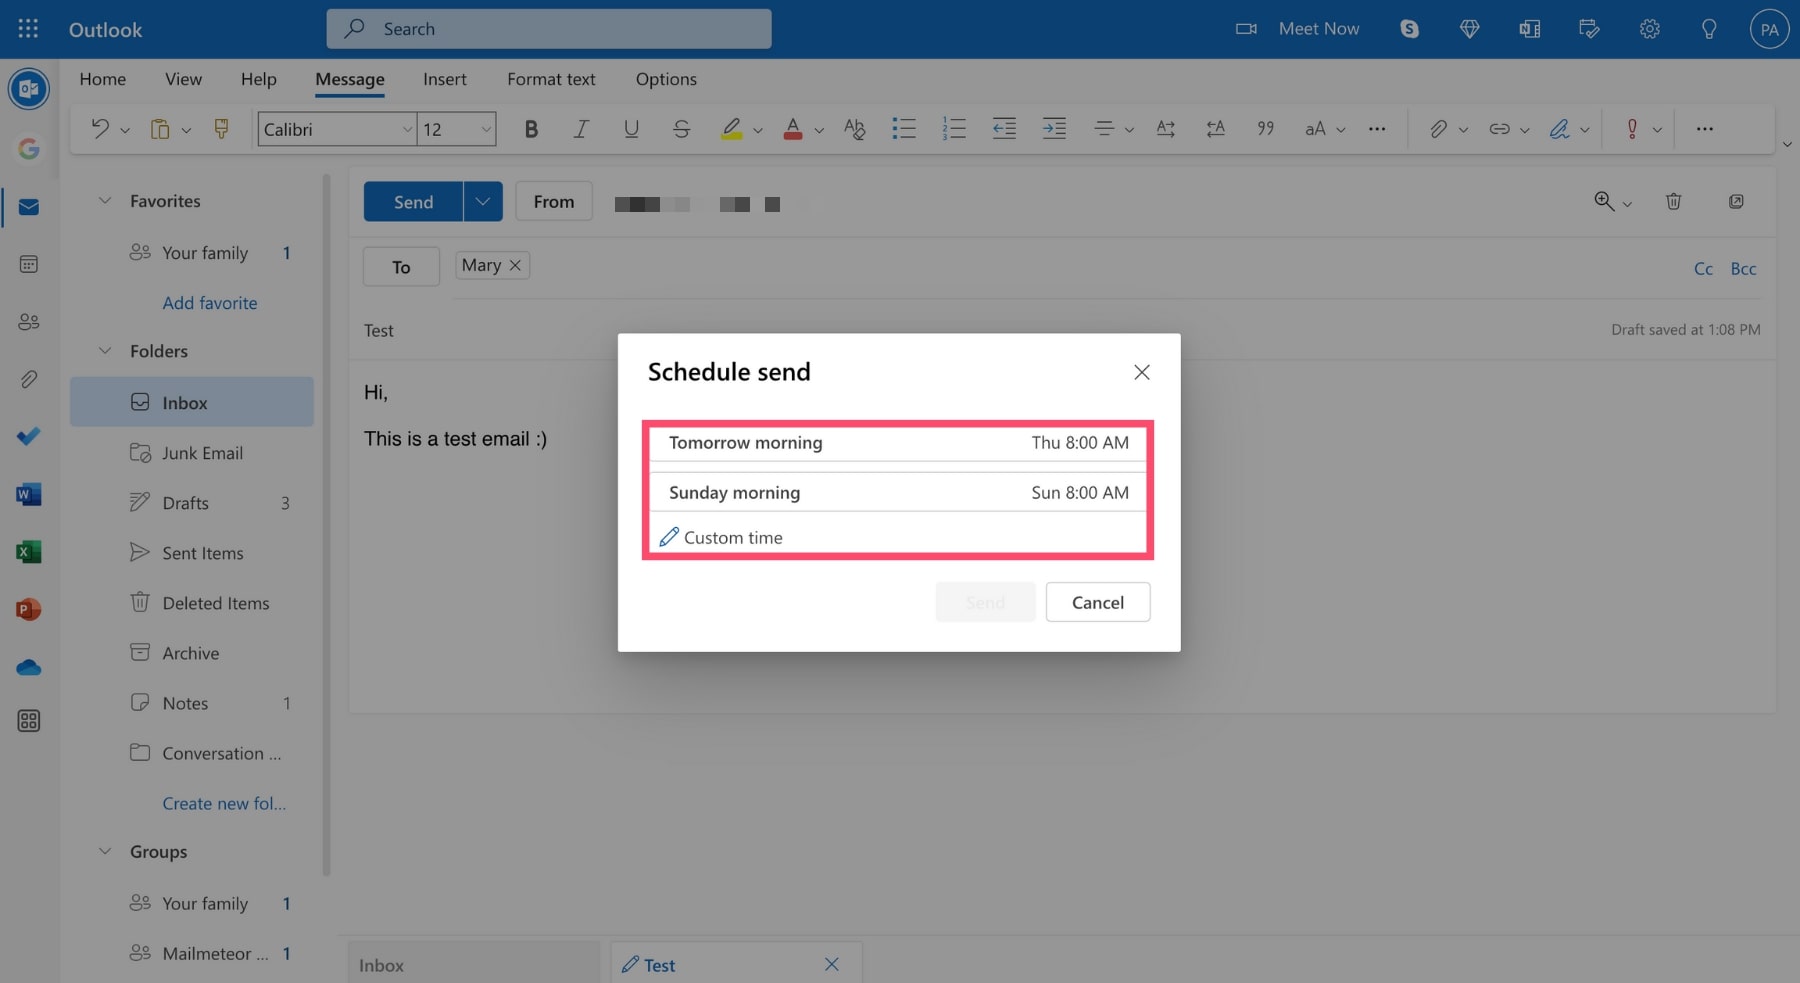
In the More Options group, click Delay Delivery. Here, you can specify the date and time you want the email to be sent. You can also set up any additional options according to your preferences.
Creating a New Email Message
When using Outlook, scheduling emails is a convenient feature that helps you manage your communication effectively. To schedule emails in Outlook, start by opening your Outlook account and selecting the “New Email” option.
Compose Your Email
Write your email as you normally would, including the recipient’s email address, subject line, and the content of your message. Ensure that all required fields are filled out accurately.
Once you have composed your email, click on the “Options” tab located at the top of the email window.
Schedule the Email
In the “Options” tab, look for the “Delay Delivery” or “Send Later” button. Click on this option to schedule your email to be sent at a specific date and time in the future.
Specify the date and time you want the email to be sent and then click “Send”. Your email will now be scheduled to be delivered at the designated time.
Scheduling the Email
Scheduling emails in Outlook is a convenient feature that allows you to compose an email and set it to be sent at a specific date and time in the future. This can be particularly useful when you want to send an email outside of regular working hours or when you want to ensure that your message is delivered at the most optimal time.
Step 1: Compose your Email
Start by composing your email as you normally would. Once you have drafted your message, instead of clicking “Send,” you will look for the “Options” tab in the email composition window.
Step 2: Access the Delay Delivery Option
Under the “Options” tab, you will find the “Delay Delivery” option. Click on this feature to access the settings that will allow you to schedule the sending of your email.
Step 3: Set the Date and Time
Once you have accessed the “Delay Delivery” settings, you can choose the date and time you want your email to be sent out. Outlook will hold the email in the Outbox until the specified time arrives.
Managing Scheduled Emails
In Outlook, you can easily schedule emails to be sent later, ensuring your important messages reach recipients at the right time. This feature is valuable for time management and communication planning.
How to Schedule Emails in Outlook
To schedule an email in Outlook, compose your message as usual. Then, instead of clicking “Send,” navigate to the “Options” tab in the message window. From there, select “Delay Delivery” to choose the date and time you want the email to be sent.
Benefits of Scheduling Emails
Scheduling emails in Outlook allows you to plan your communication strategy effectively. It helps in reaching your recipients when they are most likely to check their emails, increasing the chances of your message being seen promptly.
- Improved efficiency: By scheduling emails, you can work on messages ahead of time and let Outlook handle the delivery process.
- Time zone considerations: Manage global communication by scheduling emails to be sent during the recipient’s working hours.
Setting Reminders for Scheduled Emails
When using Outlook to schedule emails, you can also set reminders for these scheduled emails to ensure you don’t miss any important communication.
Steps to Set Reminders:
To set a reminder for a scheduled email in Outlook, follow these simple steps:
- Compose the Email: Start by composing the email you want to schedule.
- Set the Schedule: Use the scheduling feature in Outlook to choose the date and time you want the email to be sent.
- Add a Reminder: After setting the schedule, look for the option to add a reminder and select the appropriate timing.
- Save and Close: Once you have added the reminder, save the scheduled email and close the window.
Tips and Tricks for Email Scheduling in Outlook
When it comes to managing your emails efficiently, scheduling emails in Outlook can be a game-changer. Here are some tips and tricks to help you make the most of this feature.
Setting up Email Delay Delivery in Outlook
To schedule an email in Outlook, compose your message as usual. Then, instead of clicking “Send,” go to the “Options” tab and select “Delay Delivery.”
This will open a dialog box where you can specify the date and time you want the email to be sent. Make sure to double-check the time zone settings to avoid any confusion.
Using Email Templates for Quick Scheduling
If you find yourself sending similar emails frequently, consider saving them as templates. This way, you can quickly schedule these emails without having to start from scratch each time.
Automating Email Scheduling with Rules
Outlook allows you to create rules that automatically schedule emails based on specific criteria. For example, you can set up a rule to send a reminder email to your team every Monday morning.
By leveraging rules, you can streamline your email scheduling process and save time in the long run.
Frequently Asked Questions
- Can I schedule emails to be sent at a specific time in Outlook?
- Yes, you can schedule emails to be sent at a specific time in Outlook using the ‘Delay Delivery’ feature.
- How do I schedule an email in Outlook?
- To schedule an email in Outlook, compose your email, go to the Options tab, select Delay Delivery, and set the date and time for when you want the email to be sent.
- Can I change the scheduled time for an email in Outlook?
- You can change the scheduled time for an email in Outlook by opening the email from the Outbox folder, making the necessary changes to the scheduled time, and rescheduling the email.
- Is it possible to cancel a scheduled email in Outlook?
- Yes, you can cancel a scheduled email in Outlook by going to the Outbox folder, opening the email, and selecting the option to cancel sending.
- Can I schedule recurring emails in Outlook?
- Outlook does not have a built-in feature for scheduling recurring emails, but you can use third-party add-ins or tools to schedule recurring emails in Outlook.
Final Thoughts
In conclusion, the ability to schedule emails in Outlook can revolutionize the way you manage your inbox and communication strategy. By following the step-by-step guide outlined in this blog, you can take advantage of this powerful feature to streamline your workflow and improve productivity. Remember, scheduling emails allows you to reach your recipients at the most optimal times, even when you are not online. This not only enhances efficiency but also ensures that your messages have a greater impact. So, don’t hesitate to utilize this handy tool and make your email communication more effective and convenient!