Are you tired of sending emails late at night or on weekends, only to realize that it might get buried in your recipient’s inbox? Learning how to schedule sending in Outlook can be a game-changer in managing your email communications effectively. In this comprehensive guide, we will walk you through the step-by-step process of mastering the art of scheduling emails in Outlook. From composing your message to selecting the perfect time for delivery, we will cover everything you need to know to schedule sending in Outlook like a pro. Say goodbye to last-minute emails and hello to strategic communication by following our detailed instructions.
Introduction to Scheduling Emails in Outlook
In today’s fast-paced digital world, knowing how to schedule sending in Outlook can be a game-changer for maximizing productivity and time management. Outlook, as a widely used email platform, offers a convenient feature that allows users to schedule emails to be sent at a later time. This functionality proves to be incredibly beneficial for individuals who want to compose emails at their convenience but send them at an optimal time for maximum impact.
Key Benefits of Scheduling Emails
Scheduling emails in Outlook provides users with the flexibility to draft important messages ahead of time and have them delivered when they are most likely to be read. This feature is particularly useful for individuals who work across different time zones or want to respect the recipient’s working hours.
How to Schedule Sending in Outlook: A Step-by-Step Guide
1. Open Outlook and create a new email message (Ctrl + N).
2. Compose your email with the necessary details, including the recipient’s email address, subject line, and message content.
3. Click on the “Options” tab in the email composition window.
4. In the “More Options” group, select “Delay Delivery.”
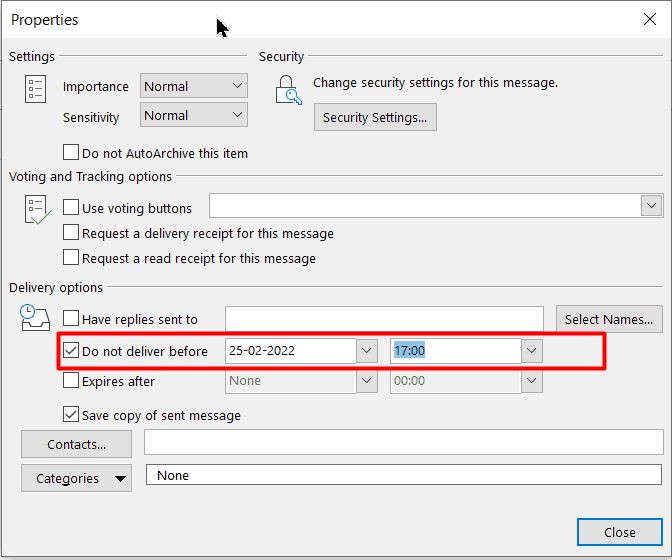
5. In the “Delivery Options” dialog box, check the “Do not deliver before” box and specify the date and time you want the email to be sent.
6. Click “Close” to confirm the delivery delay.
7. Finally, click “Send” to schedule your email for later delivery.

Setting Up Email Scheduling in Outlook
How to schedule sending in Outlook allows users to compose emails in advance and have them sent at a specified time without manual intervention. This feature is beneficial for managing communications across different time zones or adhering to a specific schedule effortlessly.
Step 1: Compose Your Email
Begin by drafting your email as you normally would in Outlook. Ensure that it’s complete and ready to be sent out at the scheduled time.
Step 2: Schedule Sending Time
After composing your email, select the “Options” tab in the email composition window. Next, click on “Delay Delivery” to specify the date and time when you want the email to be sent. You can choose the exact timing based on your recipient’s availability.
Step 3: Confirm and Send
Double-check the scheduled sending time to ensure accuracy. Once you are satisfied with the setup, click “Send” to schedule the email for dispatch at the designated time automatically.

This streamlined process for scheduling email sending in Outlook empowers users to have better control over their communications, enabling them to reach recipients at the most appropriate times without manual efforts.
Customizing Scheduling Options in Outlook
As we delve into mastering how to schedule sending in Outlook, it’s crucial to understand the various customization options available to optimize your scheduling experience. Outlook offers a range of features that allow users to personalize their scheduling preferences for emails, meetings, and appointments.
Setting Email Delivery Timing
One key customization option in Outlook is the ability to schedule emails to be sent at specific times. By using the “Delay Delivery” feature, users can choose the exact date and time when they want their emails to be dispatched. This feature ensures that your emails reach recipients at the most appropriate moment for increased impact.
Creating Recurring Appointments
Outlook allows users to create recurring appointments with ease, saving time and effort for regularly scheduled events. Whether it’s daily stand-up meetings, weekly project updates, or monthly client calls, Outlook’s scheduling options enable users to set up recurring appointments seamlessly.
Customizing Calendar Views
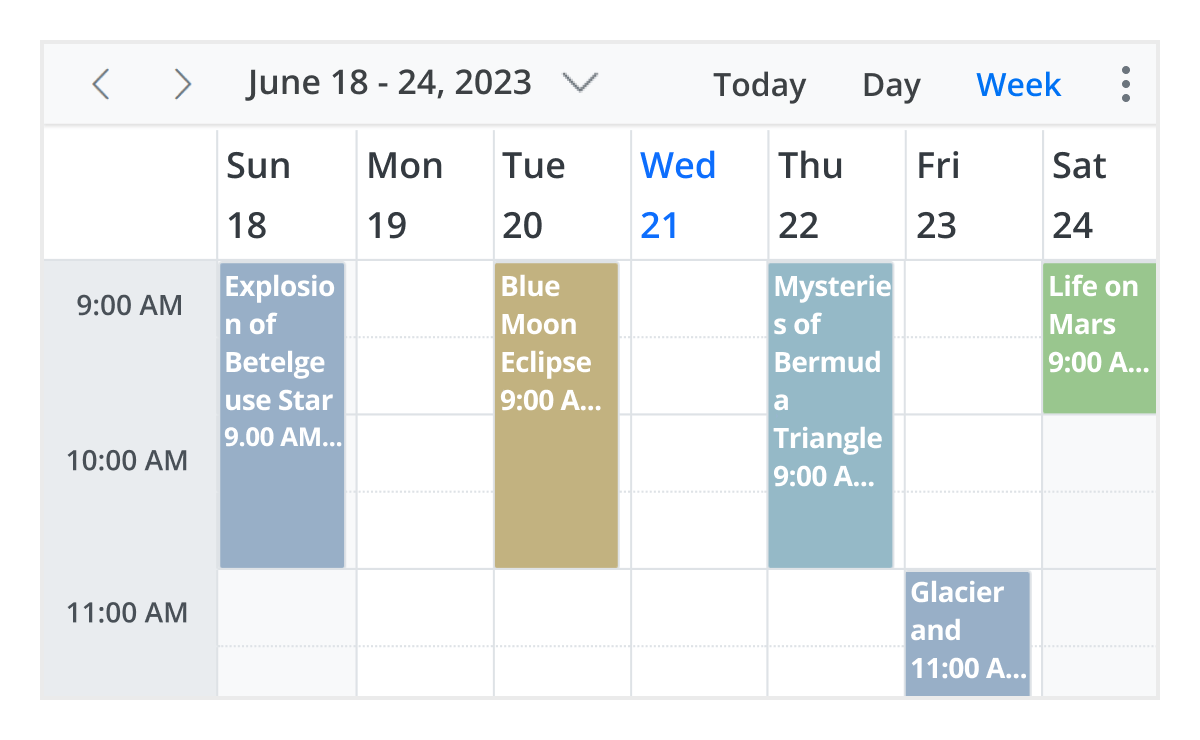
Another valuable feature of Outlook is the ability to customize calendar views based on personal preferences. Users can select different viewing options such as daily, weekly, or monthly calendars, color-coding appointments, and categorizing events for better organization and visibility.
Integrating Third-Party Calendars
Outlook also supports integration with third-party calendars, allowing users to sync their Outlook calendar with external platforms like Google Calendar or Apple Calendar. This seamless integration ensures that users can access all their scheduling information in one centralized location.

Tips and Tricks for Efficiently Using Email Scheduling Feature
Efficiently using the email scheduling feature in Outlook can significantly enhance your productivity and time management skills. Here are some expert tips and tricks to make the most out of this feature:
1. Familiarize Yourself with Outlook’s Email Scheduling Options
Before you start scheduling emails in Outlook, it’s essential to understand the different scheduling options available. Familiarize yourself with features such as recurring schedules, time zone adjustments, and delayed sending to streamline your email management process.
2. Set Clear Objectives for Email Scheduling
Define clear objectives for scheduling emails to ensure you use the feature effectively. Whether it’s sending reminders, automating follow-ups, or adhering to specific time frames, having a goal in mind will help you optimize your scheduling strategy.
3. Utilize Templates for Standardized Emails
Save time by creating email templates for commonly sent messages. Outlook allows you to save draft emails as templates, making it easy to customize and schedule repetitive communications efficiently. This can be especially useful for newsletters, meeting invites, or status updates.
Frequently Asked Questions
- What is scheduling sending in Outlook?
- Scheduling sending in Outlook allows you to compose emails and set them to be sent at a specific date and time in the future, rather than sending them immediately.
- How can I schedule an email to be sent in Outlook?
- To schedule an email in Outlook, compose your email as usual, then click on the ‘Options’ tab in the email window. Next, click on ‘Delay Delivery’ and choose the date and time you want the email to be sent.
- Can I schedule recurring emails in Outlook?
- Yes, Outlook allows you to schedule recurring emails by selecting the ‘Recurrence’ option when setting the delivery time. You can choose the frequency, interval, and end date for the recurring emails.
- Is it possible to reschedule or cancel a scheduled email in Outlook?
- You can easily reschedule or cancel a scheduled email in Outlook by locating the email in your ‘Outbox’ folder and making the necessary changes or deleting it before the scheduled sending time.
Mastering How to Schedule Sending in Outlook: A Step-by-Step Guide
Concluding our detailed guide on how to schedule sending in Outlook, it is evident that mastering this feature can greatly enhance your productivity and time management. By following the step-by-step instructions provided, you can effortlessly compose emails at your convenience and schedule them to be sent at optimal times. This not only streamlines your workflow but also ensures timely communication with recipients across different time zones. Remember to utilize this powerful tool to stay organized and efficient in your daily email correspondence. Now that you have the knowledge, go ahead and take your email scheduling skills to the next level!
