Welcome to our guide on mastering the art of scheduling emails in Outlook! If you’ve ever wondered how to schedule an email in Outlook to ensure it reaches the recipient’s inbox at just the right time, you’re in the right place. In this step-by-step tutorial, we will walk you through the process of scheduling emails in Outlook with ease and efficiency. Whether you want to schedule email reminders, promotional messages, or important announcements, learning how to schedule an email in Outlook can greatly improve your productivity and communication skills. Follow along as we explore the various features and functionalities that Outlook offers to help you schedule emails seamlessly.

Introduction to Scheduling Emails in Outlook
Scheduling emails in Outlook can save you time and improve your email management efficiency. Outlook provides users with a convenient way to schedule emails to be sent at a later time or date. This feature is incredibly useful for professionals who want to send emails during specific hours, ensuring that their messages are delivered at the most appropriate times. By mastering the art of scheduling emails in Outlook, you can streamline your communication process and enhance your productivity.
How to Schedule an Email in Outlook
To schedule an email in Outlook, follow these simple steps:
- Compose your email: Draft your email message as you normally would.
- Click on the “Options” tab: In the email composition window, locate and click on the “Options” tab.
- Click on “Delay Delivery”: Select the “Delay Delivery” option to schedule your email for later sending.
- Choose the date and time: Set the date and time when you want the email to be sent.
- Click “Close” and then “Send”: After setting up the scheduled delivery, click “Close” and then “Send” to schedule the email.

Setting Up Your Outlook Account
Setting up your Outlook account is a straightforward process that can help you schedule emails efficiently. To begin, ensure you have the latest version of Outlook installed on your device. Open the application and navigate to the “File” tab.
Creating a New Email Account
To set up a new email account in Outlook, click on “Add Account” and enter your email address. Follow the prompts to input your account details, including the server and port settings.
Next, select the type of account you are setting up, whether it’s IMAP or POP3. IMAP allows you to access your emails from multiple devices, while POP3 downloads them to a single device.
Configuring Email Account Settings
After adding your account, navigate to the “File” tab again and click on “Account Settings.” Here, you can adjust various settings such as email signatures, automatic replies, and advanced server configurations.
- Set up a signature that will be automatically added to all outgoing emails.
- Configure automatic replies for when you are out of the office.
- Check and adjust server settings for efficient email management.
Understanding the Email Scheduling Feature in Outlook
When it comes to maximizing efficiency in email management, scheduling emails can be a game-changer. Outlook offers a seamless email scheduling feature that allows users to compose emails now and schedule them to be sent at a later time effortlessly.
How to Schedule an Email in Outlook
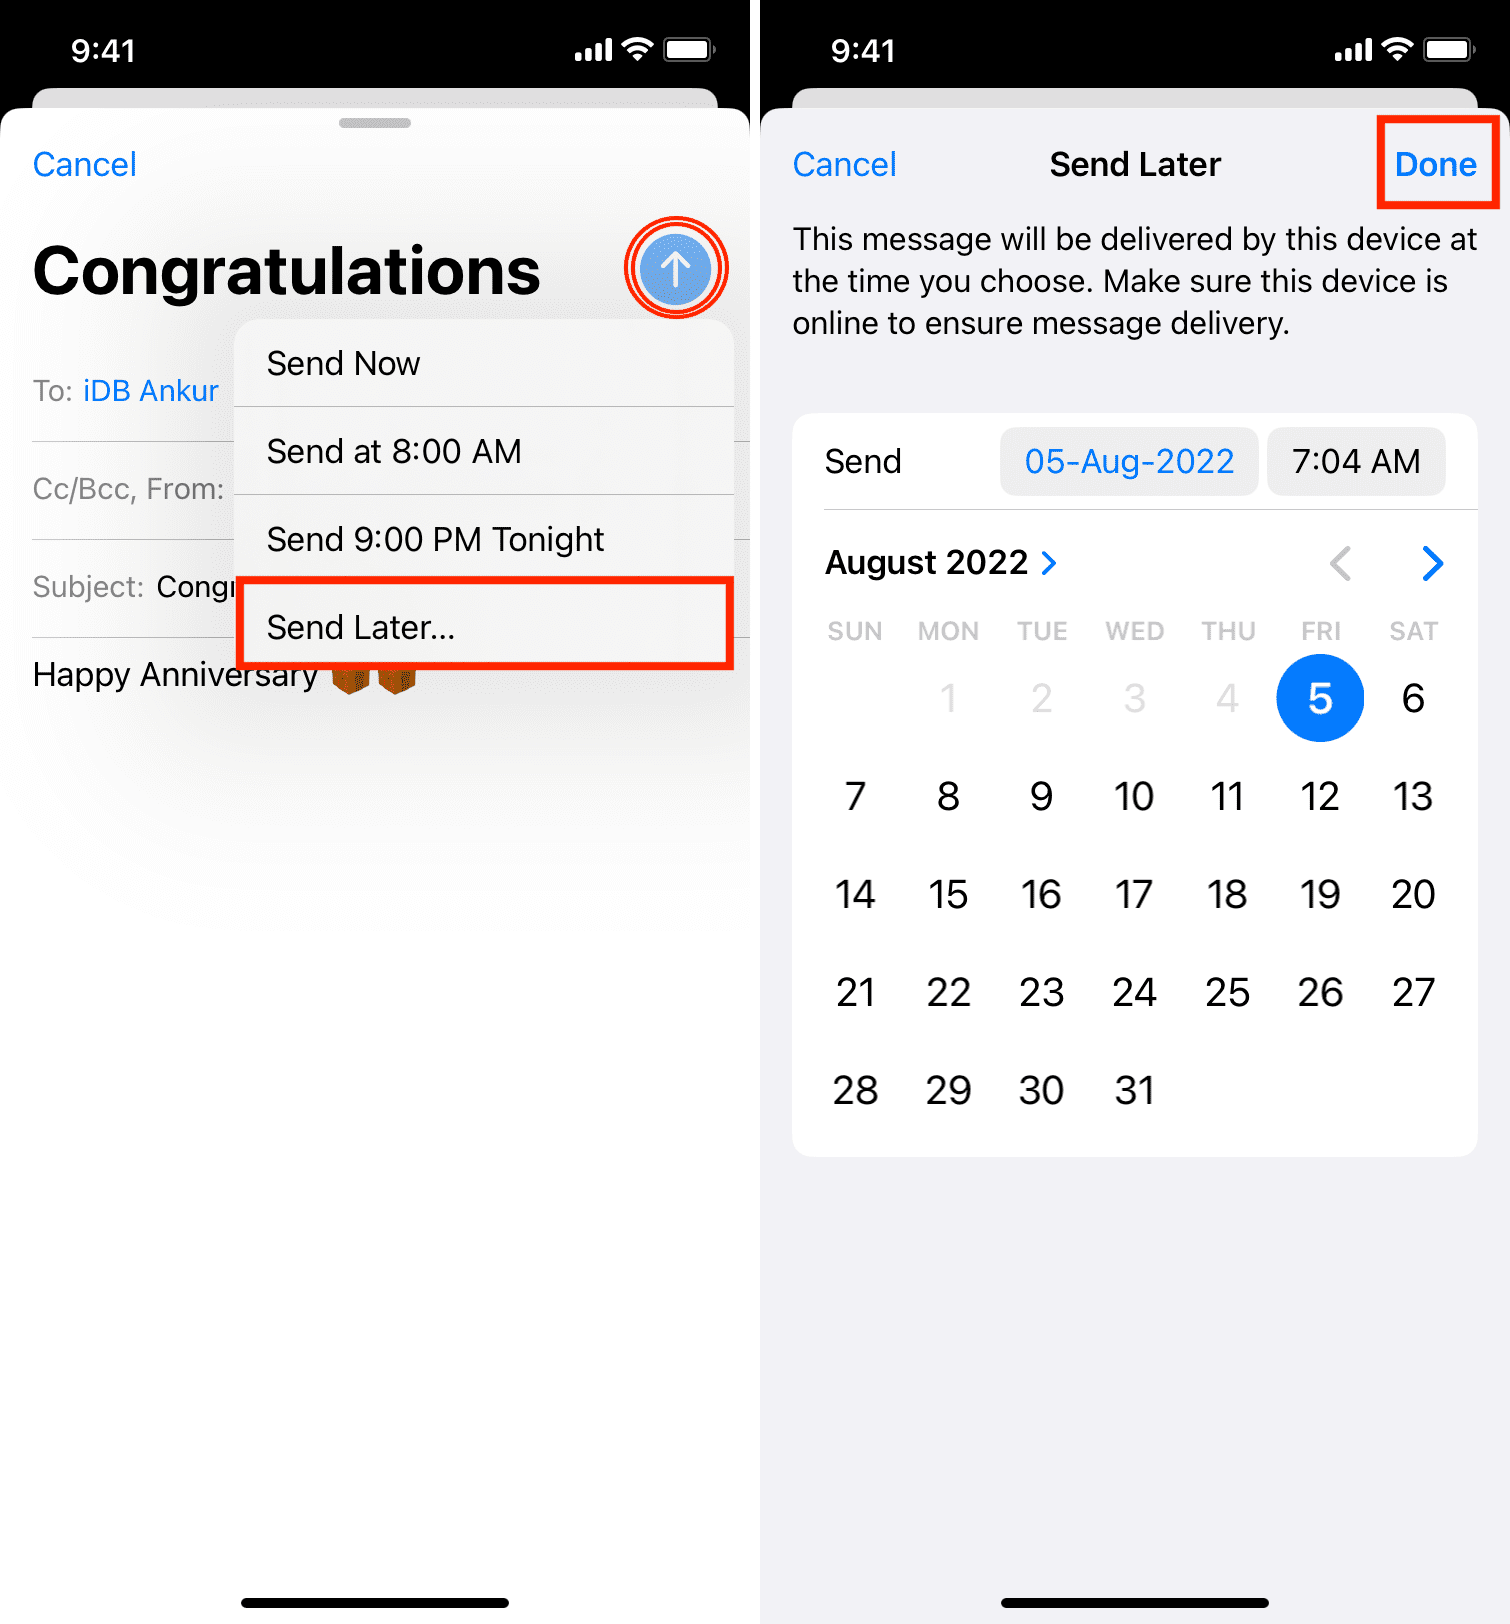
To schedule an email in Outlook, simply compose your message as usual. Instead of clicking “Send,” navigate to the “Options” tab in the email composition window. Under the “More Options” group, you’ll find the “Delay Delivery” option. Click on it to specify the date and time you want the email to be sent.
Benefits of Email Scheduling
Scheduling emails in Outlook allows you to work during your most productive hours and ensure that your messages reach recipients at the optimal time for engagement. This feature is particularly useful for international communication, where time zone differences may impact email effectiveness.
How to Schedule Emails in Outlook
If you want to schedule an email in Outlook, follow these simple steps to help you manage your communications effectively.
Step 1: Compose Your Email
Start by composing your email as you normally would in Outlook.
Step 2: Click on the “Options” Tab
Once your email is ready, click on the “Options” tab located at the top of your email window.
Step 3: Select “Delay Delivery”
Under the “Options” tab, select “Delay Delivery” to choose the date and time when you want the email to be sent.
Step 4: Set the Date and Time
After selecting “Delay Delivery,” set the desired sending date and time for your email to be delivered.
Customizing Email Scheduling Options
Customizing email scheduling options in Outlook allows you to efficiently manage and plan your communication needs. To schedule an email in Outlook, follow these simple steps:
Setting the Date and Time
When composing an email, navigate to the “Options” tab and click on “Delay Delivery.” Here, you can select the date and time you want the email to be sent. Remember, the time zone settings
Setting Reminder Alerts
You can customize reminder alerts for scheduled emails by going to the “Follow Up” tab and choosing “Add Reminder.” This feature helps you stay on top of your outgoing messages. Don’t miss any important deadlines
Best Practices for Scheduling Emails
When it comes to mastering the art of scheduling emails in Outlook, it is essential to follow best practices that can help you effectively manage your email communications. Below are some key recommendations to optimize your email scheduling process:
1. Set Clear Objectives
Before scheduling an email in Outlook, define your purpose and the desired outcome of the communication. This will help you craft a more precise and impactful message.
2. Choose the Right Timing
Timing plays a crucial role in email effectiveness. Select a time when your recipient is more likely to check their inbox, considering their time zone and work schedule.
- Early mornings or late afternoons are generally good times for sending emails.
- Avoid sending emails during weekends or holidays for professional communications.
3. Use Outlook’s Scheduling Features
Outlook offers convenient tools for scheduling emails, such as delayed delivery and recurring email options. Utilize these features to streamline your email scheduling process and ensure timely delivery.
Frequently Asked Questions
- What are the benefits of scheduling emails in Outlook?
- Scheduling emails in Outlook allows you to send emails at the most convenient time for your recipients, even if you are not available to send them manually. It helps in optimizing communication and productivity by ensuring that messages are delivered at the right time.
- Can I schedule recurring emails in Outlook?
- Yes, Outlook allows you to schedule recurring emails by setting up a recurring event in your calendar and attaching the email message to it. This feature is useful for sending regular updates or reminders to recipients.
- Is scheduling emails in Outlook secure?
- Outlook provides secure methods for scheduling emails, ensuring that your messages are delivered safely and protected from unauthorized access. However, it is recommended to follow best practices for email security while scheduling emails.
- How can I schedule an email in Outlook?
- To schedule an email in Outlook, compose a new email message, click on the ‘Options’ tab, and select ‘Delay Delivery’. Then, choose the date and time you want the email to be sent and click ‘Send’. The email will be scheduled for delivery at the specified time.
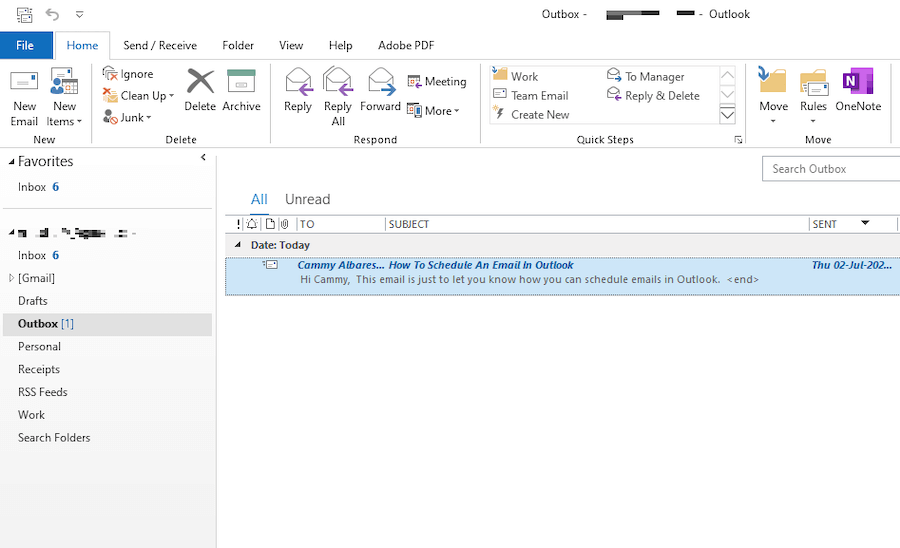
- Can I edit or cancel a scheduled email in Outlook?
- Yes, you can edit or cancel a scheduled email in Outlook before the specified delivery time. Simply go to the ‘Outbox’ folder, locate the scheduled email, make the necessary changes or delete the email, and it will not be sent as scheduled.
Final Thoughts: Mastering Email Scheduling in Outlook
Mastering the art of scheduling emails in Outlook can truly revolutionize your productivity. By following the step-by-step guide outlined in this blog, you are now equipped with the knowledge to efficiently schedule emails, set reminders, and ensure timely communication with your contacts. The ability to schedule emails ahead of time not only saves you time but also helps in maintaining a consistent and professional communication strategy.
Remember to utilize features like delayed delivery, recurring emails, and time zone options to tailor your email scheduling to meet your specific needs. By incorporating these techniques into your workflow, you can enhance your efficiency and make a lasting impression on your recipients.